This site has moved! Old posts will remain here but new posts will be at www.embergrass.com/blog. Please go there to keep up with new content and re-subscribe!

Showing posts with label Jewelry Supplies. Show all posts

Saturday, 3 March 2012

Gilder's Paste

I showed you the beginnings of a piece created with my newest skill - etching - the other day and I also told you there was more to the story.

Well I wasn't lying and I want to share the next stage in the creation of this piece today. (It involves more exciting supplies!)

Since I couldn't bring enamel into my pieces I decided to have a look at other ways to include colour and I came across Gilder's Paste.

The effect is nothing like enameling and I wouldn't use it in the same way at all but I loved it nonetheless. I like my pieces to look natural so I only bought paste in 3 colours; gold, cream and this one pictured -  'patina'.


Gilder's paste applied to the disc

I had to try the patina first since its one of my favourite colours, goes wonderfully with copper and it is possible to get copper to patina to this colour naturally. I have also had customers asking if they could get my items to this shade.


I applied the paste with a thin cloth but I also managed to get it all over my fingers. That's ok, though, it says you can use your finger to apply it. I spread a layer all over the oxidised copper disc, making sure to get the paste right into the cracks and indents.

Once the paste was dry (touch dry in a few minutes) I used a sanding block to take off the paste from the raised areas and to polish off some of the tarnish as well. When I was happy with the overall tarnish and "patina" effect I treated the disc to prevent further tarnish. I'll share that technique with you in another post.
Buffing to a shine

This little disc is getting a lot of posts for one small component that hasn't even found a home in a finished piece of jewelry yet! Of course I'll let you know when I find the perfect piece to put this little disc in!

Wednesday, 29 February 2012

Etching

I've been itching to learn some new techniques to expand my jewelry designs so, with Christmas out of the way and more time on my hands I got started!  I really wanted to pick up torch enameling and I was thinking of using my copper clay (that's still untouched) to create pieces with raised designs on to enamel cloisonne style.

However some quick research into enameling revealed the need for a mask, good ventilation etc. so I decided, since my studio is still in my bedroom, I'd have to put that idea on hold. One day I'll have a house with a nice, ground floor studio with proper ventilation and a kiln... or I'll rent out studio space somewhere.

During my research I discovered this awesome blog and there, alongside a tutorial for enameling, was a tutorial explaining how to etch copper. The more I read, the more I thought it sounded like the perfect way to create texture on my pieces and not too difficult to get started.

Painting the resist through a handmade stencil
Not long after I went a bought some Ferric Chloride (from Blick), cheap, white Acrylic paint and a small plastic container with a lid so I could use it to etch in and then also keep the Ferric Chloride in it when I'm done. While I was in Blick I also spotted some plastic stencilling sheets and added them to the basket!


Once I got all the exciting new stuff home I couldn't bring myself to use it. What should I etch on first? What design should I do? What if it doesn't work and I waste my copper sheet. Eventually the fear was replaced by inspiration and I finally got started.

Copper ready for etching


I settled on a simple, barcode-style design after realising the cute pattern of tiny flowers I'd first thought of would take me forever to cut out the stencil. I cut a strip off the stencil sheet and cut out the pattern, then stenciled it onto a simple copper disc.


Copper in the etching solution

I loved the masking tape suggestion for suspending the copper in the Ferric Chloride and it was so simple to setup. I wasn't really sure how long to leave it for. The solution around the copper went green straight away so I was worried it would be super fast process and I kept checking it every few minutes. However it took much longer, I think I left it about half an hour before I got impatient and took it out! Nail polish remover took off the acrylic paint easily.

Etched copper disc

This is the finished result. You can see the lines aren't straight but the lines of paint weren't straight either and I like the more organic feel of it. It comes out beautifully shiny but the blog recommended torch annealing the piece to be sure all the Ferric Chloride has been removed. Of course that turned my shiny piece black but my flame did glow green for a good few seconds under the torch.

I finished the disc off with another new product and technique which I'm excited to show you in a future post!

Tuesday, 28 February 2012

Once a Month Promise - February

I know I'm cutting this one right to the line but my (lame) excuse is that February has fewer days!

Anyway, coral has been on my mind lately, as I'm on the hunt for a coral bridesmaid's dress, so I'm suddenly finding myself attracted to a colour I normally shun.

This month's Once a Month Promise item is a perfect example:

Fused Glass Cabochons from Outrageous
I simply couldn't resist that bright, happy colour so I've ordered these fused glass cabochons. I already have something in mind for them, inspired by a piece I saw on the Oscars on Sunday. It should push my skills in a new technique as well so I'm really excited. They're coming from Australia, though, so who knows when they will arrive, fingers crossed it's soon, I can't wait!

What of last month's item?
Well as soon as they arrived I was inspired and knew exactly what to create with them. Unfortunately I've... misplaced the item so I can't photograph it to show you! I'm hoping a proper tidy/sort out in the next few days will reveal it, otherwise I'm going to have to buy another set and make another one (or 2, I really want to keep one for myself!)

Tuesday, 31 January 2012

New project - Rock

You know those Wedgewood beads I mentioned the other day? Well they aren't actually the first unique supplies I've been given.


I got these cute little chunks of rock from my friend Abby after I looked after her cat while they were away.

She brought them back for me from Seattle and said she thought I might be able to make something with them - how exciting! They have a very faint tinge of pink to them and I assume they're some kind of quartz.
 They came simply wrapped in that gold-coloured wire but I decided it just wasn't going to be enough of a challenge if I kept them like that.

So I took off the wire and cleaned out the dirt from all the cracks and crevices...

... and then they sat on my desk for months while I waited for inspiration to hit. I started making something with them occasionally but each time would end up dismantling the project.

Of course, eventually, inspiration did hit. I started with the smaller piece and took advantage of its rough surface to create a wiggly wrap around the top and a loop so I could suspend it. I had a long piece of brass chain waiting for a home so I added 2 tiny rose quartz nuggets and turned it into a really long pendant.

I tried to make a ring with the larger piece but it was just too big, it looked ridiculous and kept trying to turn around on my finger. Eventually I took a risk and decided to attempt to make the piece smaller. I put the rock on my steel bench block and whacked it with a hammer whilst praying I wouldn't end up with rubble all over the room!


It worked, though, I ended up with about 3 smaller pieces (and lots of crumbs). I took the largest piece and tried again to make a ring - much better. It's still quite a large ring, so for parties only but not on the ridiculous scale of the first version!

 I still haven't done anything with the final 2 pieces, I'll have to wait for more inspiration before I work on those. I'll let you know when I do :)

Tuesday, 24 January 2012

Once a Month Promise - January


You may have noticed this logo appear in the sidebar of my blog a few weeks back and wondered what it was. Well, wonder no longer, I'm about to explain it to you.

IAMTHELÄB is running the once a month promise so it's best explained in their words:

The 1ÄM Promise is easy: It’s a simple promise to purchase 1 handmade item a month. Whether big or small, each handmade item you purchase helps to keep a artist in motion.

They are looking for 100 bloggers to make the promise, to buy handmade and help spread the word, but you don't have to be a blogger to take the pledge. You don't have to buy once a month either, simply raising awareness of handmade and increasing handmade purchasing is all supporting the handmade community.

Anyway, I have made the promise so I'm going to be buying at least one handmade product every month. To make it easier for me to find something to buy and to make it more fun for you to read I've decided to combine it with a regular giveaway and here's how its going to work:
I will buy a handmade jewelry component, probably beads or findings and make a piece of jewelry with it. The following month I will then offer that item to be given away on my blog. Hopefully this will also encourage me to try out different things with my jewelry. I'll share the details of how to win when I actually have the first giveaway item ready.

Anyway, enough boring details, here is my purchase for January!

Ceramic Beads from Captured Moments

I ordered them yesterday so when they arrive I'll have to work out what to do with them (they're curved so as to be perfect for bracelets but I'm not sure if that is what I'll make). I'll post the giveaway sometime in February, once I've had a chance to make something.

Thursday, 12 January 2012

New Project - Wedgewood Beads

I'm back! A little later than I anticipated thanks to some computer problems but I'm really excited because I've got soooo many things to tell you about and so many ideas buzzing around my head for the new year!

For today I wanted to show you one of my Christmas presents from my mum:


These gorgeous beads are Wedgewood ceramic. Very different to anything I currently work with but I love getting different things to challenge my creativity.

She sent me beads in 2 different colours; blue and white (above) and teal and brown (right) and I got 4 of each. Both types of bead have a similar, swirled design but the blue and white are squarer and have bolder stripes.

I've already been pondering just what to make with them, I want to make sure I get the best possible use out of them! When I decide, I'll let you know and show you the finished result.


Also, if you were admiring my new, crisper photographs, well that's thanks to another of my Christmas presents. I'll be posting about that soon!

Did you get any creative presents this holiday season? Any new tools or different materials to encourage you to try new techniques, styles or designs? If you did, please share with us in the comments :)

Thursday, 25 August 2011

New Toys!

Just a short post this time as I've only picked up a couple of new tools and nothing hugely life changing but still fun!

First is my new texturing hammer. It has indented circles on one side and straight lines on the other. I use the circles side to make it quicker and easier for me to create the general hammered look on a lot of my pieces. 

The other side is more dramatic. This statement necklace is the first item I've used it on and I totally love the way the lines almost make the copper sparkle.

Bold Copper Discs Necklace
The other item is this metal stamp from FusionBeads. I knew I wanted to get a stamp, a fairly generic one that would look good and fit in with most items, so I was looking at flowers and sunshines. When I saw this I knew it was the one - the design just has that extra edge to make it more interesting and I haven't seen it anywhere else.

I haven't actually used it on anything yet; I've been practising using it on scraps of copper and, so far, its proving to be the most challenging new tool to master by far. I find I often get only half the design stamped or I will move it and get an offset duplicate so its going to take a little more work before I can unveil any products with it on.

Does anyone have any tips they want to share with me about metal stamping? Maybe I'm missing something or maybe there is a tool out there that will solve my difficulties? Please comment if you have any help for me :)

Sunday, 12 June 2011

New directions

When I first started making jewelry as an idle summer hobby, wire was simply a convenient way to connect the beads to the ear wires. Almost exactly a year ago I bought a hammer and a bench block and started to discover that wire could be so much more. That was really a major turning point in my jewelry designs as I began to explore the beauty of metal in different shapes and with different textures.

These copper strips curled up as I cut them out!
Since then I have continued to expand my tool collection and this has given me the ability to create a wider and wider variety of designs but none so significant as my latest purchase.

Given my obsession with the natural beauty of metal it was only a matter of time before I looked into sheet metal. Wire is great and you can do a lot with it, especially if you start using multiple gauges, but there are so many more possibilities with whole sheets of the stuff!

Of course I've always known it was available but my 'studio' setup is rather limited and I didn't think I would be able to get the necessary tools for it. My workbench has drawers in so it's not possible to attach a clamp to it and without that it would be almost impossible to saw out any shapes from the metal. Did I mention its also in my bedroom? I don't think metal sawdust is a good thing to have floating around your bedroom!


Then I found these from Fusion Beads! I really thought they were too good to be true. Surely they couldn't be strong enough to cut through metal - they're only scissors. Maybe they only work for someone who regularly lifts weights with their fingers.

Anyway, I decided they were probably worth trying out so I bought a pair and several sheets of copper.


But I didn't stop there. I also found a disc cutter to easily cut out circles from my sheets of copper and promptly ordered one of those too! It arrived this week and of course I punched a circle straight away...


...and then a few more circles...


...and then I punched circles out of circles!

It was really tough to cut out the discs, I had to get our actual proper DIY hammer because my jewelry one just wasn't tough enough and even then I had to hammer really hard. I moved the cutter onto the floor so the carpet would absorb most of the noise!
It was fun though and I have so many designs in my head for all these different sizes of circle.

My dapping block


I actually bought another gadget as well - a dapping block. I can use it to make my circles into little dome shapes - very cool :)

I have a few completed designs already and a few that I'm still working on. I'm very excited to post them up here and show you so look out for them in the next few days!

Tuesday, 22 March 2011

Soldering Copper

A few weeks ago I picked up the tools I needed to start soldering. I did quite a bit of research beforehand to work out exactly what I needed to make sure I got the right stuff and avoided buying things I didn't need. I work mostly with copper - I just love the warm, rustic colour - but most of the guides were for silver. Where copper was mentioned it was pretty clear that you can use exactly the same equipment and technique for both.

I did find quite a few blog posts discussing the fact that silver solder is silver coloured and will therefore contrast with the rest of the piece if you make it in copper. I actually used that to my advantage when I made my husband a wedding band. When I was doing my research the most common solution was also very simple - add a steel nail to your pickle pot and it will cause copper to plate onto the solder thus colouring it copper.

The silver solder is clearly visible on
these earrings

It sounded simple so I decided I would do it. Unfortunately it had no effect whatsoever. For some pieces it wasn't a problem, if there is wire wrapping involved I can just make sure to wrap over the soldered join and it will be invisible.

However on pieces like these earrings the silver blobs are clearly visible and clearly incongruous with the rest of the piece. As a result these earrings have still not been listed online. Filing could help to reduce the visibility by smoothing the curve but the silver will still be visible so I decided to continue my research.


I found out 2 things:
The reason the plating hadn't worked was probably because I used a galvanised steel nail rather than ordinary steel. I'm not even sure if nail packets specify the material they are made from but I certainly didn't think to check.

I also found out that you can buy copper coloured solder. None of the large websites seem to stock it but it can be found elsewhere (including Etsy) and I have ordered some.
It hasn't arrived yet but when it does I will definitely post up about my experiences with it.
If you have any experience with either method, or maybe a completely different one, let me know in the comments.

Copper Solder from Unkamen Supplies
In the meantime I have also ordered several gauges of sterling silver wire so I can start recreating some of my more popular designs in silver and also use up the silver solder I bought. Which metal do you prefer? Silver or Copper? Or maybe Gold? Let me know :)

Monday, 21 February 2011

New tools!

Anyone who is a fan of my facebook page will know that I recently decided it was time to learn how to solder my jewelry. When I'm sketching out new designs I am constantly limited by shapes which can be connected together through wire wrapping. Sometimes this is actually a good thing because it forces me to think harder about my designs and often allows me to think of more different ones. However there are other times when I can picture a really beautiful shape in my mind and know that there is no way I can actually make it because it wouldn't hold together or wouldn't be rigid enough.

My shiny new butane torch :)


I started by investigating the equipment I would need. The main item is a butane torch, used to heat the solder until it melts. While I could order one for $80 from my bead supplier I decided to investigate the prices from other sources and I was glad I did. In the end I found one for $30 on Amazon.com and there were several cheaper ones which would have worked too, I decided to pay a little extra for one with a stand. The most important thing to consider is the maximum temperature the flame will reach - torches designed for creme brulee don't reach high enough temperatures for soldering.


Obviously several more pieces of equipment are needed to solder safely and effectively. These were much harder to acquire. None of the suppliers I have used for beads and other jewelry tools had them and neither did Amazon. I did a google search and managed to find several companies selling the right stuff. Comparing prices was complicated because I had to take into account shipping and sometimes the products weren't exactly the same. After filling my shopping cart with the items I would need from 3 of the stores and then going through checkout until I reached shipping I discovered that Rio Grande was my cheapest option.

A heat-proof board of some kind is very important to avoid damaging or burning your work surface and it turns out these can be made from several different materials. I took the time to read up on the different types but still didn't manage to draw any conclusions so I bought the cheapest one.

Most of my jewelry is copper or silver and I couldn't find any copper coloured solder so I bought silver solder to use for both. It comes in 3 different melting points and I got 'easy' - the lowest melting point type.

Flux (used to help the solder flow where you want it) also comes in so many different forms, some of which have to be mixed with water, some already a gel or liquid. I went for 'ready flux' which is liquid.

I decided to make my own pickle (used to dissolve impurities after the soldering is complete). There are several different recipes on the internet but I couldn't find allum in the supermarket so I went with a vinegar and salt mixture: 8 parts distilled white vinegar to 1 part salt with some water. Even though I heated the vinegar to boiling before adding the salt, most of it didn't dissolve but the pickle seems to be working fine anyway.

Of course as soon as all my equipment arrived I had to test it out! I prepared a project while I was waiting for the items to arrive so it was all ready to go and I watched several videos on youtube, which were easily enough to give me a good idea of what I was doing. I found this video to be the most useful and comprehensive.

Of course I couldn't start with practice projects, that's not me! I had to dive straight in with a really important piece and I want to share that with you in a future post so keep an eye out to find out what it was!

Tuesday, 9 November 2010

Destash Sale!

I realise that this is completely the wrong time of year for spring cleaning but re-doing my website made me realise that my style of jewelry has changed rather significantly since I first began.

What started out as simple strings of beads hooked onto earwires slowly evolved into pieces almost exclusively made from shaped wire. I am very happy with the transition, I feel that my newer items are much more original and they stretch my imagination more. However it does mean that all the beads I purchased with which to make beaded jewelry are now redundant.

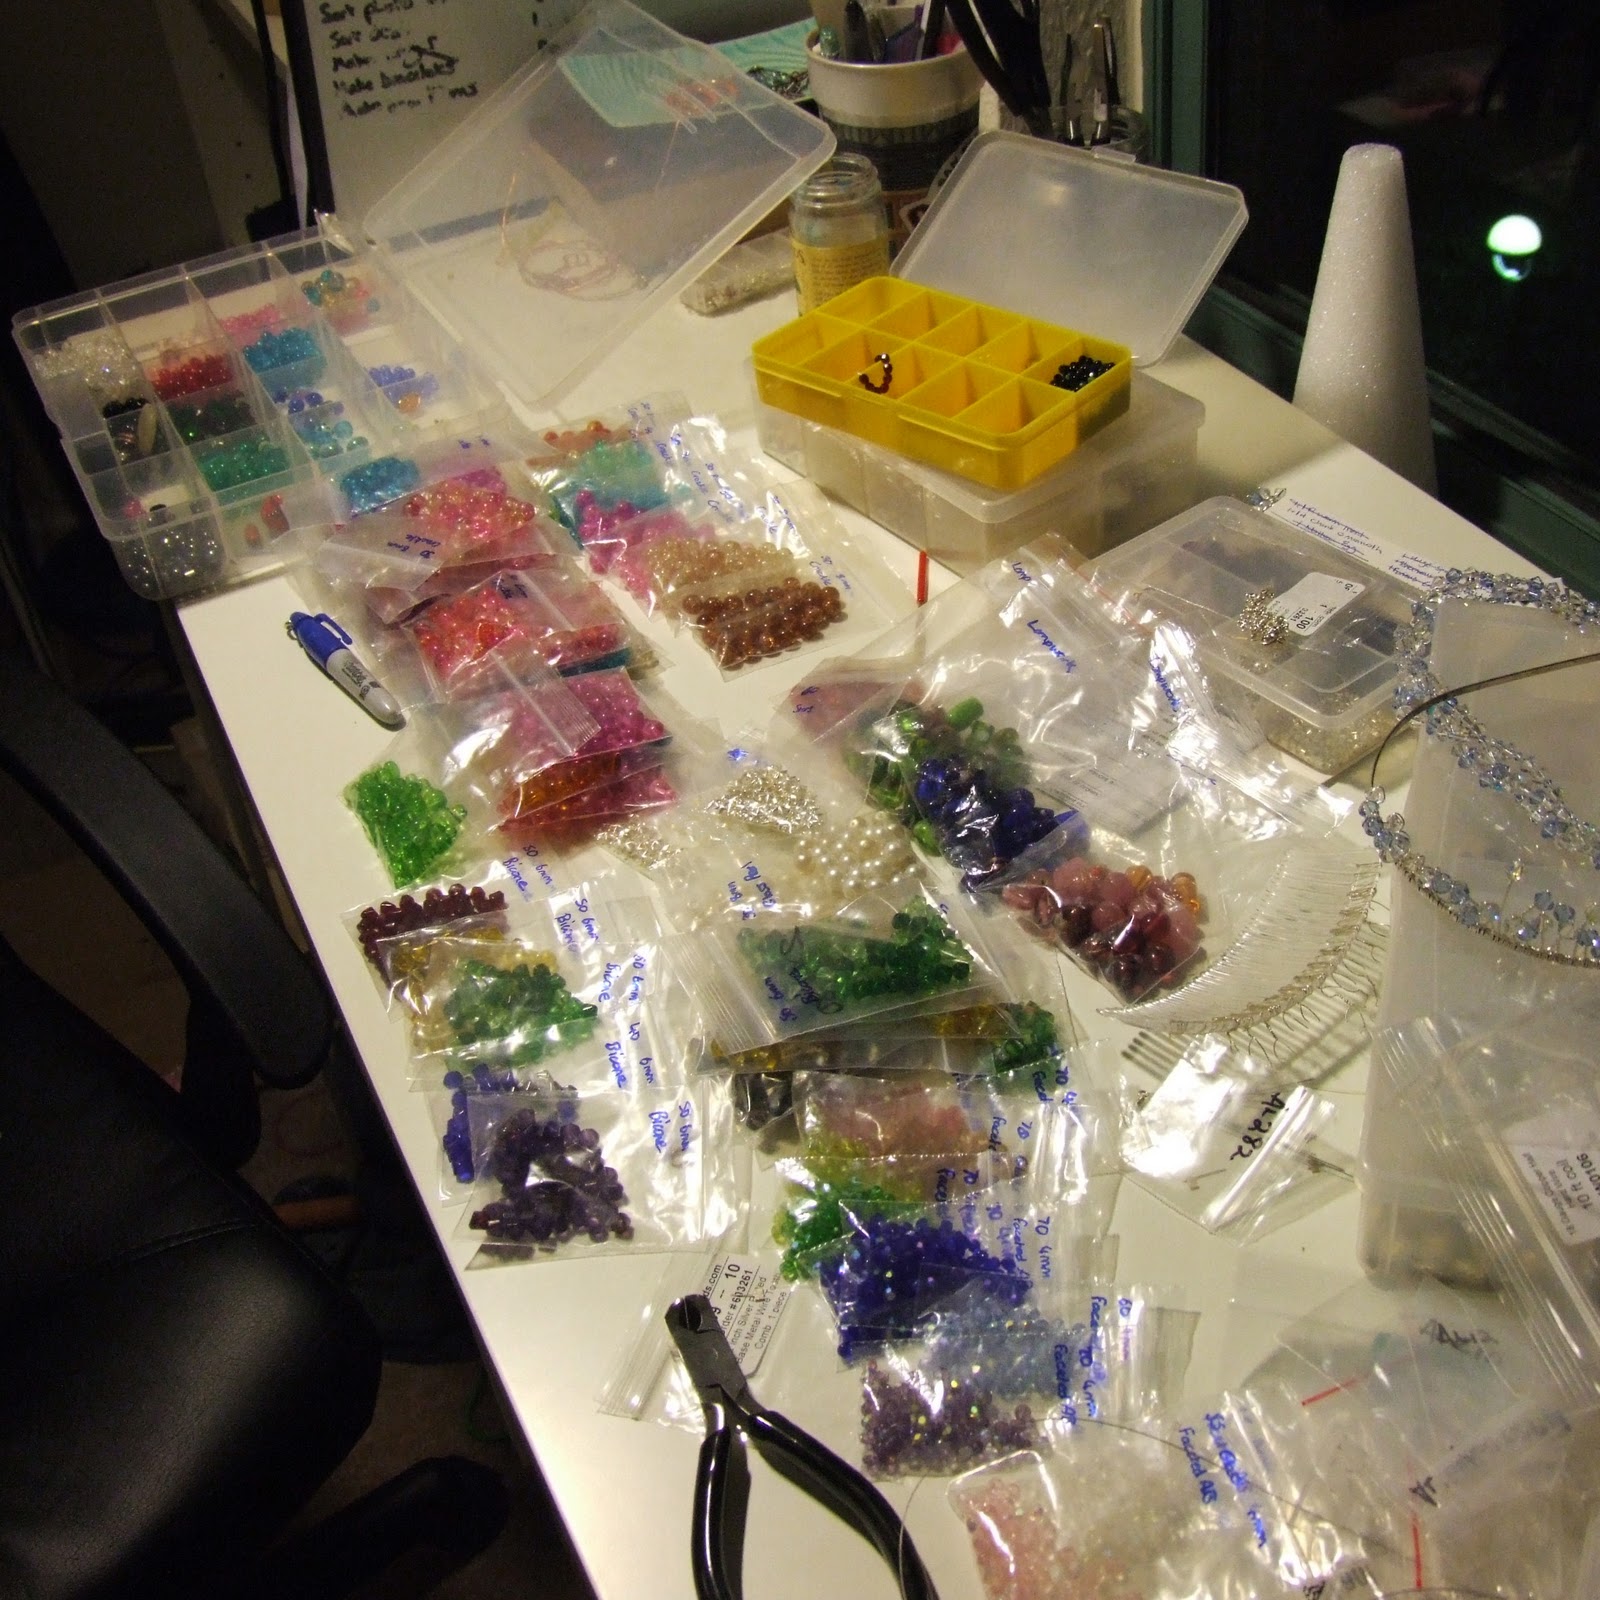
Much as it pains me to empty out my beautiful, colourful bead trays, there is no point in having beads sitting around not doing anything. So I have spent my day packaging them all up ready to sell on Etsy. Its taken a lot longer than I expected and I'm still not done, there are a few more beads to package and photos to take (fingers crossed for a sunny day tomorrow).

My workbench has been taken over with packets and packets of beads!

In the next few days I will get these listed on Etsy so if you are a beader or know someone who is, or even if you know someone who might like to start and think they would appreciate a packet or 2 for Christmas, be sure to check it out :)

Saturday, 19 June 2010

Why is hammered wire so beautiful?

First of all... multiple apologies for not having posted in so long! At first I was really busy being back in England, visiting people, planning my wedding and getting my visa sorted out. Then I came back to San Francisco and took some time to settle back in and then I just kept putting off that first post back.

Anyway, here it is and I promise I will follow it up with several more very quickly. (I have actually got lots of things stored up to blog about :))


Although I haven't been blogging, or even making much jewelry over the last 2 months I have been thinking. A week or so ago I came to the conclusion that, whilst my jewelry is very pretty and very wearable (well I like wearing it!) it isn't anything special. Doesn't take much imagination to create, isn't very different from all the other jewelry out there. I'll show you an example:


These chandelier earrings are listed on my Etsy shop. They're beautiful but when I wear them out and people ask if I made them, I feel like I'm cheating when I say "yes". I did make them but how much skill does it take when all you do is buy the silver frame and then attach the beads to it. I didn't even make the headpins!
The only imagination involved with this piece is in choosing the colours and since I like to stick to 1 or 2 colours even that is severely limited.
People who have the right equipment and make the frames themselves, fair enough. People who make the beads themselves and make them interesting and unique, fair enough. But for me, this is cheating, even though the result is beautiful earrings.


Fortunately I have also been experimenting with new ideas and techniques. I recently bought a hammer, with a selection of different end attachments, and a metal bench block.
This was really exciting as it opened up a whole new range of possibilities. I almost instantly developed an addiction to the appearance of the hammered wire pieces. They somehow manage to look rustic, yet elegant and sophisticated all at the same time and utterly beautiful. I think its one of very few styles of jewelry that can be worn casually everyday and also to a special occasion.

Very shortly after I ordered some thicker wire and restocked my coloured wire. Now I feel like I can really use my imagination and creativity to produce pieces that are unique as well as being beautiful.

These are a few of my favourite hammered pieces that I have produced recently:


All are currently available from my Etsy shop: http://www.etsy.com/shop/Carnelion

Friday, 5 March 2010

See the goodies I bought today

Today I took a trip to General Bead in San Francisco to pick up some goodies for my beading projects.
I found loads of stuff, though sadly not everything I was hoping for. I love how beads and stuff are all so tiny; I spent nearly $100 and it all fitted in this little paper bag! >


< I found these cute little sterling silver butterflies which I am going to use to make earrings with. If I like them maybe I will buy some more and make a matching necklace or bracelet.


These copper leaves and brass hoops are also going to serve as the basis for a pair of earrings.


I've fallen in love with copper jewelry, especially antiqued copper, and I've been stocking up on copper findings. Today I got some copper chain and some lobster clasps to add to my copper stocks.

I also got loads of beads, some beautiful Czech glass ones and lots of crystal-coloured swarovski crystals for my wedding range, including these cute love hearts. >


Check back in a few days to see what I've made with these materials :)

Tuesday, 2 March 2010

Where to buy beading supplies

 Ebay
So there are hundreds of options available to people wanting to make their own jewelry. When I first started I bought several packets of assorted lampwork beads, in different colours, from Ebay.
These glass beads are so pretty in their own right you can simply string them onto some elastic and you have a bracelet. 

Ebay can be great place for beading supplies but it is very inconsistent, some days you will get a bargain, other days you won't even be able to find what you want!

Bead Shops
There are also many boutique-style bead shops in town centres where you can touch and see the beads you want and buy them individually. They often have a lot of larger, more interesting beads, possibly even rare or unique beads. Such places will almost certainly have jewelry on display or for sale to provide inspiration and many will offer classes.

Bijoux Beads is the bead shop I used to go to in Bath, UK when I lived there. Its a lovely shopping experience and perfect for anyone wanting to make jewelry as a hobby. Sadly, as with most, if not all, boutique bead shops their prices are too high for anyone making more than the occasional piece of jewelry.


Wholesale Bead Stores
If you know where to look you can sometimes find shops off the beaten track which sell beading supplies at wholesale prices. Sometimes you will have to buy in wholesale quantities but usually the price just gets cheaper the more you buy.

I have found both Gen Bead and Beyond Beads in San Francisco and their prices are great. Sadly they don't offer a very big range of products and are often out of stock of items so they are only useful when they have what you want. I still prefer shopping there though, where I can actually see the items I might buy and where I don't have to pay postage.


Wholesale Online Stores
Online stores have the massive advantage of being able to stock a huge range of items and they can sell for less without the cost of maintaining and staffing a store.

Having said that, I still haven't found one online store that sells all the items I need. There are also hundreds of online bead suppliers, how do you decide which one to shop at?  To help me decide I have done a price comparison on items I frequently need from several online suppliers.


Shopping online isn't nearly as fun but it does mean I don't need to leave my house and I get the excitement of opening up my order when it arrives. The biggest problem as far as I'm concerned is the cost of postage which encourages me to make huge orders to get better value for money :S