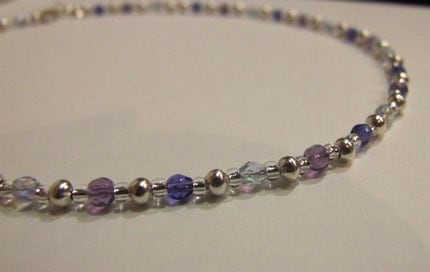
I realised the other day that signing up for craft fairs and such was all well and good... but how exactly was I going to display my items should I get accepted for one?
As usual my husband listed my budget for display equipment as "as little as possible" so I decided to have a go at making my own from materials I already had in the house or materials I could obtain for free. I spent hours browsing google images for inspiration on unique and interesting display ideas and I will be investigating quite a few more over the next few weeks. However most of those require at least some spending and/or trips to other locations so for the moment I just have one basic idea to share:
1. Start by cutting out the basic shapes from corrugated cardboard - 2 circles, one sort of egg shape and 2 strips. The sizes are entirely up to you and they don't need to be very accurate.
2. Glue the pieces together (ordinary PVA glue is fine) so they form the correct shape. You can use just one strip to hold the top to the base but using 2 makes it easier to get the angle right.
3. Papier Mache over the entire shape, taking care to keep the definition between the central circle on top and the rest of the top. You can use wallpaper paste or flour and water glue for the mache but I prefer PVA glue heavily diluted with water. At this stage ordinary newspaper is fine.
4. There are several options for the final stage depending on the finish you prefer. I quite like the rustic look and it is difficult to escape it with papier mache anyway so I chose to coat the stand in further layers of white tissue paper and leave it at that. If your jewelry is bold you may prefer to leave it with the newspaper for a more unusual finish. If you prefer a colourful stand you can always paint it or use coloured paper instead. Note that the paper must be thin to allow it to fit the contours smoothly and also so you don't get thick bumps where it overlaps.
I fitted a piece of raised wire into the top of my stand to allow me to hook earrings over it as well, to better display matching sets. I also fitted a hook into the back so necklaces longer than the stand can be gathered behind the stand. The only issue I have with this stand is that it is very lightweight meaning it is quite easy to knock over. This could easily be fixed by putting something heavy inside the upright portion before macheing over it.
The finished stand is pictured displaying my Lilac Dream Necklace and Earrings which are available from my Etsy store.


No comments:
Post a Comment