This site has moved! Old posts will remain here but new posts will be at www.embergrass.com/blog. Please go there to keep up with new content and re-subscribe!

Showing posts with label Design Process. Show all posts

Saturday, 3 March 2012

Gilder's Paste

I showed you the beginnings of a piece created with my newest skill - etching - the other day and I also told you there was more to the story.

Well I wasn't lying and I want to share the next stage in the creation of this piece today. (It involves more exciting supplies!)

Since I couldn't bring enamel into my pieces I decided to have a look at other ways to include colour and I came across Gilder's Paste.

The effect is nothing like enameling and I wouldn't use it in the same way at all but I loved it nonetheless. I like my pieces to look natural so I only bought paste in 3 colours; gold, cream and this one pictured -  'patina'.


Gilder's paste applied to the disc

I had to try the patina first since its one of my favourite colours, goes wonderfully with copper and it is possible to get copper to patina to this colour naturally. I have also had customers asking if they could get my items to this shade.


I applied the paste with a thin cloth but I also managed to get it all over my fingers. That's ok, though, it says you can use your finger to apply it. I spread a layer all over the oxidised copper disc, making sure to get the paste right into the cracks and indents.

Once the paste was dry (touch dry in a few minutes) I used a sanding block to take off the paste from the raised areas and to polish off some of the tarnish as well. When I was happy with the overall tarnish and "patina" effect I treated the disc to prevent further tarnish. I'll share that technique with you in another post.
Buffing to a shine

This little disc is getting a lot of posts for one small component that hasn't even found a home in a finished piece of jewelry yet! Of course I'll let you know when I find the perfect piece to put this little disc in!

Wednesday, 29 February 2012

Etching

I've been itching to learn some new techniques to expand my jewelry designs so, with Christmas out of the way and more time on my hands I got started!  I really wanted to pick up torch enameling and I was thinking of using my copper clay (that's still untouched) to create pieces with raised designs on to enamel cloisonne style.

However some quick research into enameling revealed the need for a mask, good ventilation etc. so I decided, since my studio is still in my bedroom, I'd have to put that idea on hold. One day I'll have a house with a nice, ground floor studio with proper ventilation and a kiln... or I'll rent out studio space somewhere.

During my research I discovered this awesome blog and there, alongside a tutorial for enameling, was a tutorial explaining how to etch copper. The more I read, the more I thought it sounded like the perfect way to create texture on my pieces and not too difficult to get started.

Painting the resist through a handmade stencil
Not long after I went a bought some Ferric Chloride (from Blick), cheap, white Acrylic paint and a small plastic container with a lid so I could use it to etch in and then also keep the Ferric Chloride in it when I'm done. While I was in Blick I also spotted some plastic stencilling sheets and added them to the basket!


Once I got all the exciting new stuff home I couldn't bring myself to use it. What should I etch on first? What design should I do? What if it doesn't work and I waste my copper sheet. Eventually the fear was replaced by inspiration and I finally got started.

Copper ready for etching


I settled on a simple, barcode-style design after realising the cute pattern of tiny flowers I'd first thought of would take me forever to cut out the stencil. I cut a strip off the stencil sheet and cut out the pattern, then stenciled it onto a simple copper disc.


Copper in the etching solution

I loved the masking tape suggestion for suspending the copper in the Ferric Chloride and it was so simple to setup. I wasn't really sure how long to leave it for. The solution around the copper went green straight away so I was worried it would be super fast process and I kept checking it every few minutes. However it took much longer, I think I left it about half an hour before I got impatient and took it out! Nail polish remover took off the acrylic paint easily.

Etched copper disc

This is the finished result. You can see the lines aren't straight but the lines of paint weren't straight either and I like the more organic feel of it. It comes out beautifully shiny but the blog recommended torch annealing the piece to be sure all the Ferric Chloride has been removed. Of course that turned my shiny piece black but my flame did glow green for a good few seconds under the torch.

I finished the disc off with another new product and technique which I'm excited to show you in a future post!

Friday, 18 November 2011

Pinterest

Are you on Pinterest?

If you haven't heard of Pinterest you are missing out! I have to admit, I ignored it for a long time before a friend of mine finally explained exactly how great it was to me.

If you love collecting things, beautiful pictures or browsing the internet for pretty things this site is for you. If you have a strong sense of personal style which you want to share, or if you prefer to be inspired by others, you will love Pinterest. One warning, though, it can get addictive!

So what, exactly, is it?

It's a website that acts like a virtual pinboard. Any pictures you see on the internet can be pinned with a couple of mouse clicks. You can create different boards for different categories to keep all your inspirations separate and you can browse hundreds and hundreds of things other people have pinned. If you find pins you like from other people you can repin them onto your own boards as well and if you find people who regularly pin things you love, you can follow them.

Sample of a few of my Pinterest boards

If you're interested to see some of the things I love besides jewelry or want a peek at the images and ideas which inspire my jewelry then check out my Pinterest page: pinterest.com/embergrass/.

I'd love to see some of things which inspire you, too, so let me know your Pinterest account (or follow me) so I can follow your boards :)


Friday, 20 May 2011

Here comes the sun!

Today I want to share with you another of my most ambitious and intricate projects - the Sun Pendant.

I found these Fire Agate beads on sale and couldn't resist their intense colour and interesting patterns. I found a few other focal beads that day but these were by far the biggest and most striking.


When they arrived I wasn't disappointed but I quickly realised that they wouldn't fit the style of any of my existing pieces - it was time to branch out!


Pendant by KSJewelleryDesigns
I wanted to keep the style simple whilst still doing justice to the central bead and I was inspired by designs such as this one:


I went ahead and made up a full design in copper, but realised when it was complete that it wasn't rigid enough and the central stone was free to rotate so I took it apart and made a few key changes.


I started with a soldered circle, only very slightly bigger than the Fire Agate bead. I shaped and hammered 6 little fancy loops and soldered them individually to the circle to provide extra strength to the design. Soldering also makes it much easier to wire wrap the piece when the time comes, though I'm sure technically its cheating!


After soldering the copper has a patina which I usually buff clean. However for this piece I decided to leave the antique finish to enhance the final design. Soldering does make the metal soft and flexible though, so I tumbled the finished frame for several hours to strengthen it and to return the shine to the metal.


The final stage is to wrap the bead into the centre of the circle and then to add wire wrap to soldered pieces for extra strength and also to make the design look nicer. I also added a single piece of wire across the back to prevent the bead from turning around in its "setting". One of the hardest parts was working out where to attach the chain, I toyed with the idea of attaching the chain at opposite sides and having the piece as a high-sitting choker but in the end decided that would be too uncomfortable.


What do you think of this piece? Do you like it or is it not your style? Do you like reading about how I make my items? If you do, check back soon as I have a few more posts lined up about making some more of my latest designs!


Wednesday, 18 May 2011

Asymmetric Necklaces

Has anyone else noticed that lately the trend in necklaces is increasingly towards asymmetric designs?

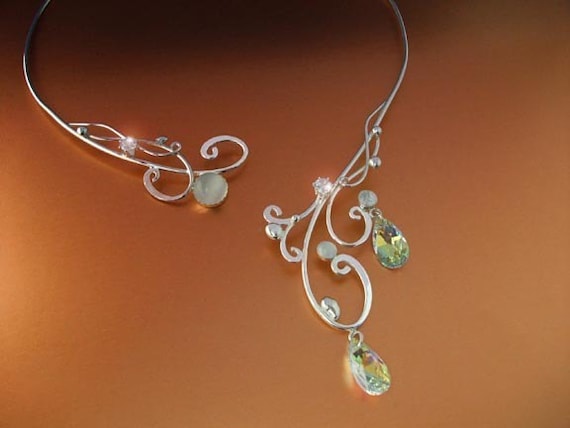
Asymmetry has been seen for a while in items like torcs and chokers, which sit high on the neck and are usually rigid. This elven-style bridal torc is a stunning example.

Bridal Torc by ElnaraNiall

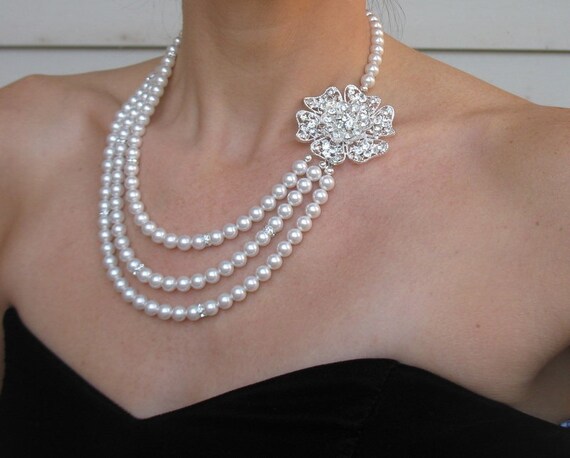
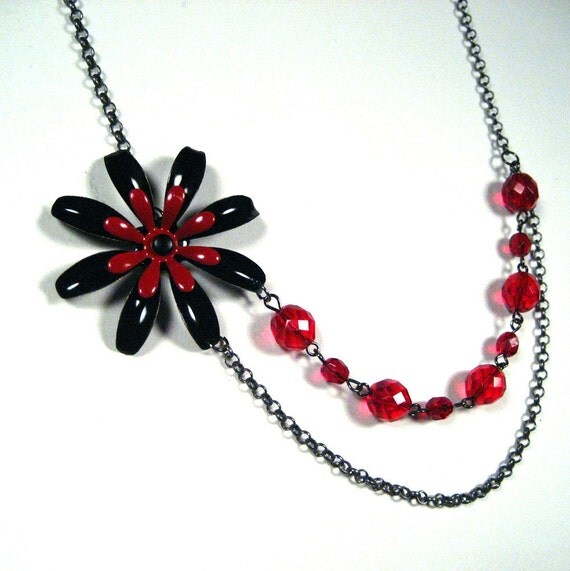
More recently slightly longer and more flexible designs have started to feature asymmetry. The major design trend seems to be to place the focal point of the necklace to one side and then have the chain continue down and around. Often the lowest part of the necklace will be beaded as well.
Here are 3 very different examples of this style of design:

Denise Jewelry Designs
Spiderella Studio

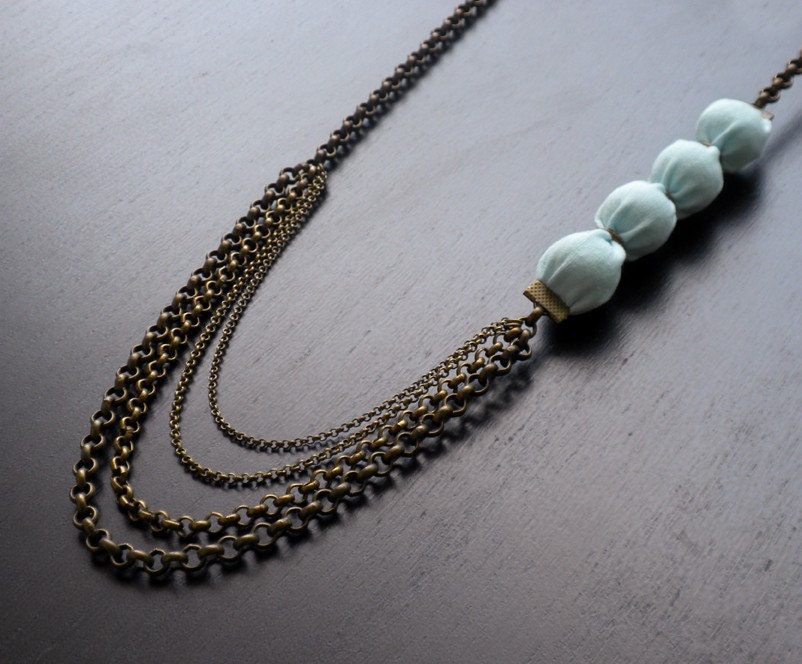
Another asymmetric trend is to have one length of chain or design continue down after the 2 have met in the middle. Often a dangle of some kind is placed on the end.
Here are a few beautiful examples:

Forevermore Creations

Also from Forevermore Creations

Le Collezione

An experiment in soldering a flower resulted in a focal piece I decided would lend itself perfectly to the 2nd style of necklace. A few golden Citrine beads later and I produced this summery piece:


The flower is made from six individual copper petals soldered together. I added some gold tone wire wrap around the centre to represent pollen and to add some contrast. However, since I made it I have decided that the flower is too large for the necklace and that I can do a better job on the soldering since I've had some more practise. So I'm going to remake the flower and then I will be listing this on Etsy, look out for it :)


Thursday, 24 February 2011

Handcrafting a Wedding Band

Remember the project I mentioned in my previous post? Its finally finished and now I can share it with you!

My husband was never very keen to get a wedding band. Neither of our fathers wear one, he doesn't like or wear jewelry of any kind and he is self-conscious about his fingers. I wasn't unduly bothered by this but I suggested that he got one anyway even if he didn't want to wear it, just to have. He considered it but in the end decided that was just a waste of money.

Soldering the strips side by side
However, when I got my soldering equipment through I realised that I could potentially make him one. It wouldn't cost much and even if he hated it or it turned out really badly the time would have been well spent as I would have learnt a lot from it.

Once I have an idea I have to go for it and I had a vague plan of giving it to him for Valentines day. I started with some 12 gauge copper wire and hammered it flat. I then curved it around my mandrel (guessing his size), cut off the excess and filed the ends so they were flush. Unfortunately that is as far as I got as my equipment didn't arrive before Valentines day, so I gave him that and explained the idea.

His response was actually positive so as soon as my items were delivered I set about soldering the 2 ends together to join the circle. After some filing, oxidising and polishing I was surprisingly pleased with the results but we decided the band was too thin and looked too feminine.

Cue an even more ambitious project!
The newly shaped and joined ring
is buffed smooth
I figured if I could join 2 strips of flattened copper wire together side by side it would not only make the band wider but also provide a contrasting colour strip all around the middle.
Initially the hardest part was getting the 2 strips of wire straight enough that they would be flush with each other but filing the sides did the trick. Joining the 2 pieces was surprisingly easy but filling the gap all the way along without spilling solder all over the wire was very tricky. Fortunately my file came to the rescue again!

Once the 2 pieces we neatly joined all that was left was to shape the ring around the mandrel, cut off the excess and join the 2 ends together. I filed away any bumps to make it smooth and shiny and finally oxidised it so the silver strip around the middle would go black.


The finished ring!

Wednesday, 19 January 2011

Designs - Valentines Day

You may remember my blog post Inspiration - Valentines Day from about a week ago. In it I looked at different sources of inspiration for designs for Valentines Day.

Now I'm going to show you some of the designs I came up with using that inspiration.

I started with some keywords the inspiration had thrown up and then tried some initial sketches based around them. As I can't directly represent many of the ideas I had to find abstract forms which conveyed their essence instead. It proved to be a lot more difficult than I had imagined and in the end I resorted to using hearts a lot more than I had intended to. Over time I kept adding to my page with new ideas which came into my head - not necessarily relating to the theme.

Once I had a few ideas I started making items

First was this one. I took the basic heart shape and distorted it slightly, adding some intricate silver wire wrapping and a very pale pink glass nugget. The result is far too fancy for my taste but I may experiment with a simpler version.
I did like the colours - the way the copper provided a pinky feel without using any sickly sweet or in-your-face pink - so I decided to use them in my next piece. This one works around the idea of binding 2 people together in love, simply represented with the 2 copper sections joined by the silver wire wrap.
I made a few other pieces which I didn't like very much and ended up with just one more acceptable item. This one uses hearts again - I had a stash of these cute little glass heart beads and decided now was definitely the time to use them! These earrings are my favourite of the 3 and also inspired a series of birthstone jewelry which I will show you soon.
I have ordered some rose quartz beads, as that is the stone most associated with love, and when they arrive I will play around with a few more designs. Hopefully I can come up with a few I really love! These 3 will be appearing in my Etsy Shop sometime today or tomorrow.

Thursday, 18 November 2010

From Start to Finish

When I first started making jewelry I used to pick up the materials I liked the look of and start stringing them together with absolutely no planning whatsoever. Of course back then I had a very limited set of skills with which to work so any attempt at planning, beyond choosing which beads should go together, would have been a waste of time anyway.

As I started to try out new techniques and bring new materials into play I initially continued along the same lines. Since I didn't know what I was capable of it worked well for me to simply play around and see what came out. Some pieces turned out looking like an electrically-challenged person's attempt at wiring a house, fit not even for recycling as the wire had been bent too many times, but some pieces turned out well and I learned from those and carried those elements forward into my future designs.

Nowadays I have settled much more on a fixed style, I have played around with the materials I now stick to and I know what works and what doesn't. This, in turn, has allowed me to conceptualise on paper and has given me an actual process for creating new pieces. It's this process I thought you might be interested in today.

Stage1:
The first step always involves my notebook but it depends what mood I am in as to exactly how it goes. Sometimes I see things when I am out, other jewelry, aspects of nature or even completely random things that give me inspiration for a design. As soon as I reach my notebook I put the designs down before I forget.
Other times, if I'm feeling in a creative mood, I will deliberately sit down with my notebook and attempt to draw designs. Often I will draw several designs and then scribble out the ones I don't think will work but sometimes I will draw the basic shapes that work for my current pieces and experiment with how different ones look next to each other.
Either way, the end result is a book full of little pictures.

You may have seen some of these ideas already!
Stage2:
At some point I review the little pictures and cross out any that won't work and mark any I particularly like. I may also write on if I think the design would work best for earrings or a pendant or how it could be changed slightly to work for another item.
These ticks and crosses only have some bearing on which ideas end up getting made. When I feel like making something new I flick through my notebook and pick out whatever takes my fancy at the time. Some ideas, even if marked as ones to be made, never actually get made because they just don't inspire me when I have the wire in my hand.

Stage3:
This is the fun part :) Usually I will make the designs exactly as I drew them but occasionally I will make changes as I go, through error or because I realise something isn't going to work or is going to be too difficult to make it look neat. My notebook is only in black and white so I still need to choose the colours of wire I'm going to use and the colours of any beads to incorporate.

Stage4:
Some designs still don't make it past this stage. Any designs which I make but which don't inspire me when done tend to sit around and never get listed. Even though I know that someone will probably like it even if I'm not so keen on it it somehow never makes it onto the photography pile and eventually ends up in the recycling box. The rest of my shiny new pieces will all get photographed and edited ready to be listed.
One of the pieces that got left out, even after making, photographing and editing.


Stage5:
Believe it or not there are a few pieces that still don't get through here. Usually pieces which are difficult to photograph  rather than through any fault of their own but some items, even after having their pictures taken, just never end up getting on the internet. I have a spreadsheet in which I track the materials used in each piece and the time taken to make it, to allow me to calculate a good price to sell it for. The final step is to list the items in my Etsy shop :)